Velvet sand for nails
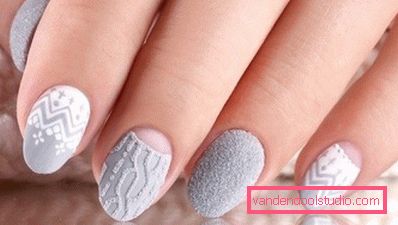
Perhaps you had to see three-dimensional patterns on the nails, created as if from velor fabric, this effect gives velvet sand for nails. Today, this technology is at the peak of its popularity, so we cannot but introduce you to it. We will tell you how to do nail design with velvet sand with your own hands, show beautiful photos of such a manicure and informative video tutorial.
On the technology of manicure with velvet sand
Velvet sand for nails is an acrylic powder of different shades, crushed to a nano-dust. It can be applied on top of a dry gel polish or gel paint, as a result of marigold effect is obtained on the nails. Top marigolds are not covered with a top to keep a rough texture. In the nail art, this material has gained great popularity, since the technology of creating a manicure with velvet sand is incredibly simple, and the rough surface imitating velor fabric looks original and nontrivial.
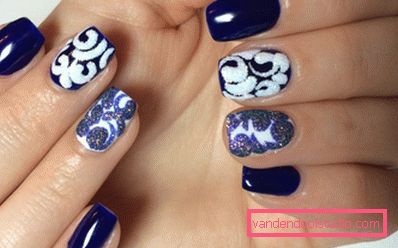
The cost of the material is cheap, its price varies within 60 rubles for a jar of 7 g. You can buy velvet sand in specialized stores for nail art. The wide color palette allows the master to execute the most intricate design in any scale. In addition, this material is transparent. It allows you to achieve "sugar" effect and create a texture on the surface of the nail, without affecting the color composition.
The author of the technology of manicure with acrylic powder was Ekaterina Miroshnichenko, by the way, the famous liquid stones on the nails are the fruit of the fantasy of the same nail master. Ekaterina is the chief technologist of her own company E.MI, which specializes in the production of manicure products. Initially, the technology involved applying acrylic powder on E.MI gel paint, but skilled craftsmen came up with a worthy alternative and applied sand on top of gel polish, getting a similar result.
How to perform a manicure with velvet sand
Velvet sand on the nails, although it creates a volume on top of the nail plate, but "to wear" such a manicure is comfortable. Outwardly, it seems that manicure with velvet sand is short-lived and fragile, but if you observe the technology, such nail art will please you at least a week. We will tell you how to make it yourself.
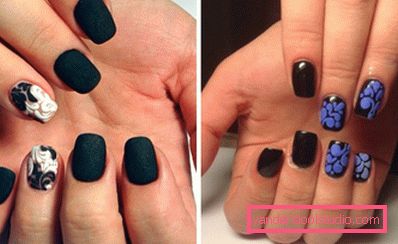
Materials and tools for velvet manicure
To velvet sand on the nails looked decent and the result was persistent, you need to combine it with gel polishes and gel paint. Ordinary varnishes are not suitable for this, as with such a coating the powder crumbles very quickly. In addition, the volumetric drawing of velvet sand on the nails is obtained due to the fact that the consistency of gel polish or gel paint is dense and thick, and ordinary varnish will not give such an effect.
So, for a manicure you need:
- Colored sand (acrylic powder) selected shade.
- Gel polishes. For the execution of the simplest nail art, one gel polish will be enough, but if you want the pattern to stand out on the nail, take 2 contrasting shades.
- Base gel polish and top.
- Ultraviolet lamp.
- Gel paint. You can purchase E.MI gel-paint, the use of which is provided for by Ekaterina Miroshnichenko’s technology, its price is about 450 rubles. And you can look for an analogue cheaper, the cost of gel-paint from other manufacturers from 200 rubles.
- Brushes. You will need a thin brush for drawing the picture and a fan brush in order to shake off the excess acrylic powder from the nail.
Having prepared everything you need, you can begin to design.
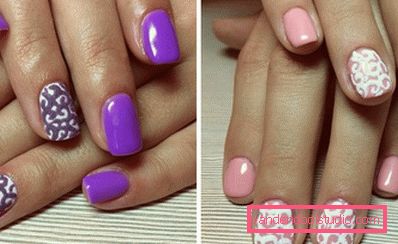
Step by step scheme performance velvet manicure
Decide on the design: decide on which nails you will have a pattern, and which will remain only with a monochrome coating. The following step-by-step instruction will help you to make a drawing with velvet sand on the nails:
- First of all, the nails are polished with a finely abrasive nail file.
- They are then treated with a degreaser.
- The plates are covered with a base for gel polish and the hand goes to the lamp for a moment.
- Apply the selected shade gel polish on the nails. In order for the coating to be dense and not translucent, it is necessary to apply it in 2 layers. Each layer polymerizes in the lamp for 2 minutes.
- The final layer is the top coating, then the hand is again sent for 2 minutes to the lamp.
- A thin brush gel paint is drawing. You can make a pattern and gel polish, but it is more difficult for them to draw fine details. You can depict everything you want: curls or monograms, flowers and even simple dots.
- On the wet gel-paint is poured a rich layer of powder. It can be a single color, and you can even create a gradient of colors moving into each other.
- The hand goes to the lamp for 2 minutes.
- Fan brush need to chill away the excess powder. Manicure ready!
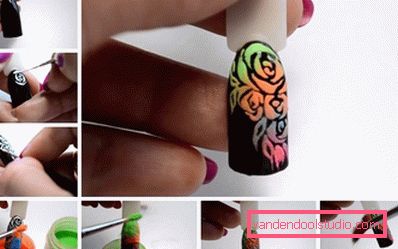
As you can see, the process is very simple and the most difficult in it is neat drawing of the picture. The secret of impeccable design in compliance with the rules of applying gel varnish and selection of shades of materials. Be sure to try!