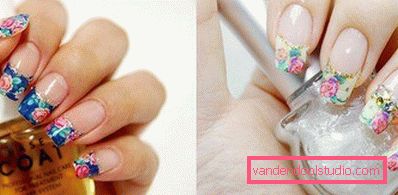
Photo design for nails - learning how to “glue” a photo

Every woman and every girl wants to have beautiful well-groomed hands and can not do without a neat manicure. And in order to spend a minimum of time on it, it is worth using modern materials - stickers for photo design of nails. With their help, you can change the image every day and at the same time remain stylish. The main thing is to figure out how to use photodesign for nails yourself, or use the services of a master. By the way, it is easy to buy sets of such stickers and the price fully corresponds to the quality.
What is a photo design
Nail photo design is the creation of a manicure with the help of ready-made special stickers created for each nail. Since stickers for nail photo design today are made with a wide variety of images, designs and patterns, the number of variations of manicure is simply limitless. In fact, such stickers are printed on a thin film on a starch basis. The film is very thin, so it blends perfectly with the surface of the nail plate and at the same time allows you to apply a fixing layer of varnish, usually transparent, over it. The film itself is also transparent, so the images can be absolutely any and take either the entire surface, or only part of it.

Appliances photo-design
Unlike other ways to create images on nails, nail photo design does not require much time or special skills. The scheme of application is very simple - preparation of the nail surface, neatly sticking the film with the image you like and covering it with a protective layer. Doing it step by step, you can become the owner of a catchy manicure, which will surely attract the attention of others. By the way, due to simplicity, the cost of the procedure is much lower than creating a manicure in any other nail art technique, especially if you do it at home with your own hands.
The stages of creating a manicure with photo design

To understand how to use photodesign for nails, you should find out the order of each stage of creating such a manicure. The instruction is:
- Hand skin treatment with antiseptic;
- degreasing of nails with the help of a special composition - helps to remove excess moisture and contamination from the nail surface, due to which the film “fits” better with the bed;
- applying a base coat of a suitable color - since the film is transparent, the background can be chosen in any shade, for example, universal white;
- Choosing a photo drawing that is appropriate for the width of the nail - if the print is wider, it needs to be cut, of course, if the drawing permits;
- separation of glue prints from the base (substrate) - using a sharp tip of nail scissors, you need to gently pry the edge of the pattern, pick it up with tweezers, transfer it to the nail and press it;
- if there are bulges or folds on the marigold, you need to gently straighten them with your fingers, because in the end the drawing should be smooth;
- repeat the procedure on all nails;
- apply a layer of fixer over the sticker.
Photodesign for nails should be applied gradually, acting carefully. The procedure is simple, so you can perform it at home, and with some skill, to yourself.

The advantages of manicure with photo design
The use of stickers with ready-made images in the process of creating a manicure make it interesting for both clients and craftsmen.
- Firstly, such a technique greatly simplifies and facilitates the work of professionals in the manicure business, and also saves time.
- Secondly, it makes impossible the client's claims to the master, because the client chooses the image himself before the procedure begins.
- Thirdly, the client gets a higher quality image on the nails than even the best artist can draw. Stickers for nail photo design are notable for their photographic clarity and amazing detail, which is why prints are so diverse and numerous.

For the beautiful representatives of the female half, nail photo design is also attractive because even without having skills in the art of nail art, you can create a unique manicure with your own hands. If you show a little imagination, you can even make exclusive prints from stamped stickers, adding rhinestones, colored lacquer touches, beads, or other suitable elements at the last stage.
Tips when creating a manicure with photo design

When using labels for photo design at home, it is worth considering some of the recommendations of professionals.
- For example, it is worth making a couple of vertical cuts at the top and bottom of the sticker so that the film lies smoother, because the nail is a convex surface.
- It is also worth carefully degreasing the nails before sticking, so that the film adheres better.
- With the same purpose, it is worth cutting the sticker a couple of millimeters on the sides so that there is a free surface along the edges of the nail. When it is, the drawing will be better fixed with a painted over varnish.
- Another recommendation: use gel or acrylic fastening, which will extend the durability of the manicure up to 3 weeks.