Nail extension on forms acrylic and gel

The procedure of nail extension can not be called a difficult process, to master it by virtue of almost every. Modern neyl-masters use two technologies - nail extension on forms and tips and the first one is more popular both with masters and clients. If you decide to comprehend this skill, it will be useful for you to find out what nail extension is on forms, what forms are and how they create perfect nails. About this and talk.
What is the nail on the form
Nail extension on the forms involves the use of artificial blanks - templates. They are substituted under the free edge of this nail, creating a continuation of it. Top master distributes the gel or acrylic. After the material hardens, the template is removed, and the artificial nail is filed off with a file. For the convenience of the wizard, there is a markup on the templates. To carry out nail extensions on the forms, the free edge of a natural marigold must be at least 1-2 mm, otherwise laying a template under it will not work.

What are the forms for building?
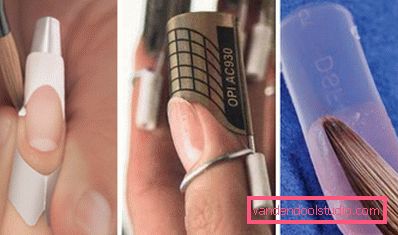
Depending on the material of manufacture, disposable and reusable templates are separated, as well as the upper forms:
- Disposable have a paper base coated with a metal or polymer. Their advantage is low cost and the ability to independently adjust under the arch of the marigold using nail scissors. Their minimum price is 10 rubles for 10 pieces.
- Reusable have a wire frame and made of Teflon. It is easier to use them due to their rigidity. The cost of 600 rubles for 10 pieces, but this set will serve you for a long time.
- The upper forms are made of transparent silicone and repeat the bends of the plate. If you want to build up the marigold itself, the most convenient way is to make nails on the upper forms. They have a different size and are suitable for use and gel, and acrylic. The price is about 100 rubles for 10 pieces.
What forms are better than tips?
Each master chooses for himself which technology is more to his liking. It is believed that the gel on the forms looks more natural than on tips, but the second technology is simpler. There are also fundamental differences between these technologies and in some cases tips will simply not work:
- If natural nails are flat and wide, it will be very difficult to pick up a tipsy, but paper blanks can be cut to the desired size.
- If the nails are bent down, tips too will not work, as the curved plate will present difficulties for fixing tips.
- The disadvantage of building on tips is that they are attached with glue, which, when often in contact with water, gradually dissolves and the nails can flake off. The most vulnerable point is the gluing zone of the tips, if you glue them wrong, the nails can disappear almost immediately.
- If the plates are too sensitive to file grinding, it is better to choose patterns.
- Acrylic or gel on the forms allows you to create a solid monolithic structure of the marigold. At the same time, the result looks natural and elegant, distinguished by high strength.
Gel nail extensions on the forms allow the master to reveal his full potential, creating an unusual design and non-standard outlines of the free edge. However, in order for marigolds to look aesthetically pleasing and durable, you need to know all the subtleties of technology and pattern substitution. Here you can help our nails on the form with the use of gel and acrylic.
Lessons on building forms for beginners
Before we consider the step by step nail extension on the forms, we will prepare the necessary materials and tools. In addition to templates, you will need:
- Gel or acrylic, depending on your preference.
- Brushes for applying material.
- Orange Cuticle Stick.
- Brush for shaking off dust after sawdust.
- Acid primer for acrylic or essential for gel.
- UV lamp.
- A set of files of different rigidity for grinding and polishing.
- Means for removing the sticky layer if you want to replace the nail polish remover without acetone. The same tool can clean brushes from materials.
- Antiseptic to maintain the sterility of instruments and hands.
- Cuticle oil.
Gel nail extensions on forms
Regardless of whether you choose reusable or disposable templates, gel nails are applied to the forms in the same way:
- First of all, the hands must be treated with antiseptic. If you don’t grow your nails, both your hands and the client’s hands are processed.
- Orange stick to push back the cuticle.
- With the help of a soft file, the surface of a natural marigold is treated. You do not need to cut the plate too hard, it is enough to remove the natural shine. This will ensure reliable coupling them with the gel.
- If your marigolds are long, we saw the free edge, leaving 1.5-2 mm.
- Remove dust with a brush and degrease marigolds.
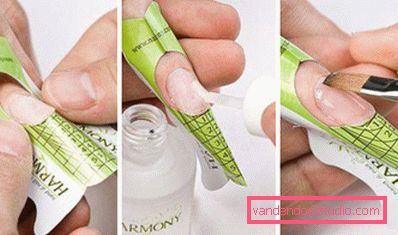
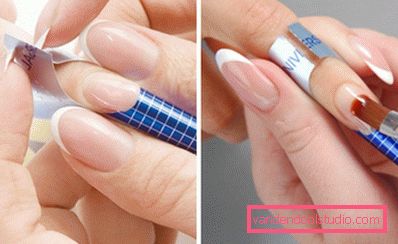
- We enclose the template and fix it under the free edge of the plates. In order for the template to sit correctly, its bend and the smile line of the plate must match. There should be no gaps between them. If you chose paper patterns, correct them using nail scissors. Teflon patterns need to be brought under the free edge and secure with wire on your finger. The form should go completely under the corners of the free edge of the nail. Look at the side of the finger - it should not be too raised up or down.
- Apply primer and let it dry.
- After that, using a brush, apply a layer of gel on the whole natural plate and pattern to the desired mark, retreating from the cuticle half a millimeter. Hold your finger at a 45-degree angle so that the gel does not leak to the cuticle and skin on the finger. Try to immediately set the shape of the free edge. Brush the gel in small droplets, and then stretch them on the nail.
- Dry under the lamp for about 3 minutes.
- Repeat the application of a layer of gel. When applying the material, look at the finger from the side, the arch of the marigold should follow the shape of a crescent.
- Place your hand under the lamp.
- Remove the adhesive layer with a special tool.
- After gel freezing, the templates are removed from the free edge to the palm. If the gel is bent along with the template, then it is necessary to dry it in the lamp.
- File 100-180 grit give the free edge of the desired shape and length. Gel nail extensions on the forms for beginners are best done using a 180 grit file; you cannot cut too much. Filing gel at the cuticle and side rollers, remember that the transition from artificial to natural nail should be smooth.
- Brush shake off the dust after sawdust.
- Apply a thin layer of gel to shine. It is applied very thinly, as if you paint the nails with varnish, overlapping the junction of the gel and the natural plate.
- Dry under the lamp for about 3 minutes.
- Remove the sticky layer.
- At the end, oil is applied to the cuticle and carefully rubbed into the skin.
Nail acrylic on forms
Nail extension with acrylic on the forms, as well as with the use of the gel, begins with the preparation of the nails: filing their length and moving the cuticle. After that, the phased scheme of action is as follows:
- A layer of acid primer is applied on the nails. It will provide the right grip acrylic and natural nail.
- If the primer involves drying in a UV lamp, place your hand under the lamp for 2 minutes.
- Remove sticky layer with a degreaser.
- Saw the surface of the nail.
- Put on the templates.
- Prepare liquid and acrylic powder.
- Dip a brush in liquid and dip into powder.
- An acrylic ball will be formed on the brush, which should be distributed with a brush on the plate.
- Take another drop of acrylic and continue nail modeling.
- Dries acrylic without lamp. It takes about 5 minutes to dry. After that, you can work with a nail file, giving the nail the desired shape and length. Pay special attention to the joint of acrylic and natural plate.
- Minor roughness removed buff.
- Brush off dust after filing.
- The final step is the application of top coating. Dry it under the lamp for about 2 minutes.
- Remove the sticky layer with a degreaser.
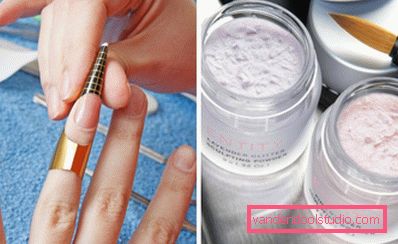
Remember that nail acrylic on forms should be carried out in a well-ventilated area, as the material has a peculiar pungent smell.