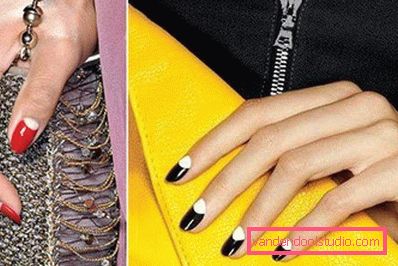
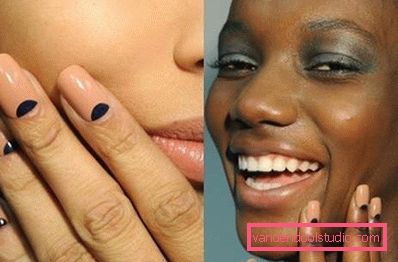
Moon manicure gel polish

Lunar manicure gel polish is a tribute to the long-standing traditions of the “Hollywood manicure”, popular in the 40s of the twentieth century. With the light hand of the fashion house Dior in 2010, this extraordinary nail design again took top positions in the art of nail art. Let's take a closer look at several ways how to make a moon manicure gel with lacquer with your own hands.
Simple in execution, but no less original than other ideas for decorating nails, moon manicure with gel is a great way to give an unusual look to nails. Fashionable trends allow even in such a design to show their imagination: the hole of the nail bed is decorated with a standard smile, as well as with triangular, rectangular shapes, drawings or decorative elements.
Ways to create moon nail art gel polish
Method 1. Using a stencil
In order to make a moon manicure gel varnish, we need: the base, two contrasting shades of gel polish, fixer, stencils, UV lamp. Stencils can be bought on a free market, and prepare them yourself.
Next, follow the step-by-step instructions for the implementation of the lunar nail design.

- Remove residual lacquer from the nail plate.
- We steam out the hands in the bath with essential oils and sea salt.
- Treat the cuticle with an emollient. Remove excess manicure scissors or forceps.
- Sawing nails, giving them the desired shape.
- Apply moisturizer. We do self palm massage.
- Carefully process the nail plate with a degreasing agent.
- Apply to the nails basis, dried in the UV lamp.
- We cover them with a shade of varnish that will be a moon accent. Dry in the UV lamp. Each new coat of lacquer is thoroughly dried with a lamp.
- Cover the area with a stencil, which will remain unpainted, and apply the main color. We remove stencils. Dried in the UV lamp.
- Apply fixative.
- Enjoy the result.

Method 2. Use a brush
Lunar manicure with the help of gel polish with the use of a brush suggests a standard scheme for performing the previous instruction in steps 1-7. Next, we work in this way:
- Apply the main color of the manicure on the nails, carefully drying each layer with a lamp.
- Using a brush, draw the holes at the base of the nail bed in a second, contrasting color. Dry in the UV lamp. To create a pattern on the nails it is convenient to use an eye liner with a long soft bristle.
- We apply fixative and enjoy the result.

Method 3. Use foil
Such a moon manicure gel will be a bright accent of your image. Contrasting combinations of dark lacquer and shiny foil always attract attention. To create such nail art we repeat steps 1-7 step by step. Further:
- Cover the nails with the main color. Apply the required number of layers, drying each in a UV lamp.
- The area of the nail hole gently draw a brush with glue for the foil. Let the glue dry.
- We apply the sticker with the transfer foil matte area down to the treated area. Give dry. Sharply remove excess foil from the nail.
- In the case when the foil is unevenly imprinted on the nails, we again apply glue to this area and repeat the familiar actions.
- Cover the nails with a fixer.

Lunar manicure gel at home - a great way to give your nails bright accents. For those who have all the necessary equipment, it is easy to make a stylish design by yourself. In addition, such nail art stays on nails much longer, without losing the brightness of colors and its original appearance. Prostate design allows you to vary the design, come up with extraordinary drawings and ways of decorating the moon nail art. To change the palette, you only need a nail polish remover and a new shade in your color scheme. Do not be afraid to experiment - nail design is limited only by your imagination!