Manicure with stripes - beauty in simplicity
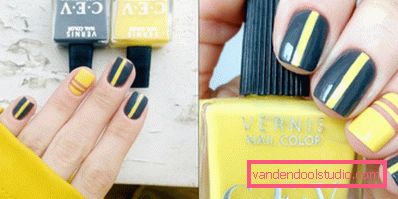
Today, elaborate and complex patterns on the nails look irrelevant. Professionals recommend decorating their nails with simple patterns, but what could be simpler than a strip? Manicure with stripes is the hit of the spring-summer 2015 season. We offer you several step-by-step schemes for performing such a nail design and tell you how to make nail stripes neatly and quickly.
Materials and tools for manicure with stripes
Manicure with strips will be able to perform any girl at home on their own. To do this, you will need the following nail materials and tools:
- Tape. You can create a striped pattern with a ribbon in two ways: you can stick the ribbon on top of the dried coating, laying out a pattern with it or using it as a stencil.
- Foil for manicure. With this material you can create different patterns, we will tell you how to make spectacular strips on the nails using foil.
- Paint brush or varnish with a thin brush. This way will suit girls with a firm hand, it takes a little more time to perform.

Create a striped nail art
Creating a nail design with stripes, you can fully trust your imagination. Use harmoniously combined shades and remember that the horizontal transverse stripes on the nails will visually make the plate wider and the vertical longitudinal ones longer. The most successful color combinations: white and blue stripes, black and white classics, mint-white Tiffany Style. The most current duets this season: burgundy with beige, gray with lime, emerald with olive. To pick up "friends" between two or more shades, use the color spectral circle, combining opposite colors. We offer you several step-by-step schemes, perhaps they will be inspiring for you.
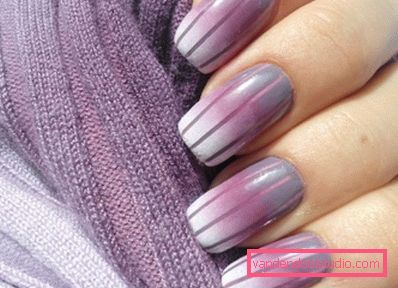
Striped design with ribbon in nautical style.
To perform the strips on the nails, most often used a special adhesive tape for a manicure. This is the easiest and fastest way to provide you perfectly smooth stripes on the nails. The color gamut of the material is very wide, the ribbons are glossy and holographic, you can easily choose the necessary shade for the designed design. The cost of the tape is about 100 rubles, so you need to acquire such material for express-art. To perform marine nail art, you need white and dark blue lacquer, tape of any color. Step by step stripes on nails are created like this:
- Cover the nails with white lacquer. Wait for the first layer to dry and apply the second.
- After the white coating is completely dry, place the tape on the nails vertically, at an equal distance from each other so that the ends of the tape protrude beyond the limits of the nail plate. Our goal: to imitate a navy vest.
- Apply navy blue to nails. Without waiting for the coating to dry, carefully remove the tape by pulling on the protruding tip.
- After a few seconds, apply a layer of glossy finish to align the printed image and fix the result.
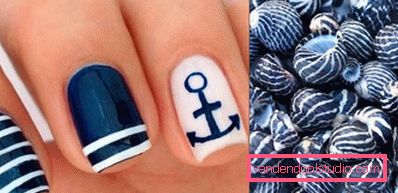
Our marine nail art is ready. If you find such a manicure too simple, you can add it with a silver shimmer varnish. Use a thin brush to apply a shimmer on 2 white stripes on the nails of the middle and ring finger.
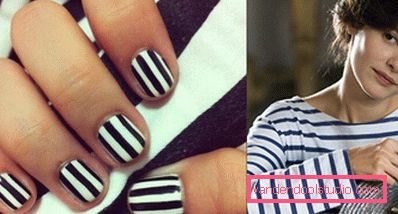
Striped Nail Art with Baroque Foil
The following design of striped nails, we suggest you perform with the help of foil for manicure. This nail art will be the perfect complement to any evening look, making your hands chic. Foil is untranslatable and transferable. The second option is more practical and the result will look neater. For such a manicure, we suggest you choose the burgundy and gold colors that are classic for the Baroque style and so relevant this year. You will need: burgundy lacquer, gold transfer foil, glue for foil, thin brush, nail scissors and colorless top. Step by step instructions are as follows:
- Use scissors to cut the foil into small pieces slightly larger than your nail plate.
- Apply burgundy nail polish to your nails. Wait until it dries completely.
- The most difficult step is the application of glue. From your accuracy depends on the final result. With a thin brush and glue, draw 2 flat horizontal stripes closer to the tip of the nail on the little finger, ring and index finger.
- Wait a couple of minutes, the glue should dry out.
- Attach gold foil to the place of the future striped pattern, press.
- With a sharp movement tear off the foil from the nail.
- Cover with a layer of fixative.
The thickness and number of stripes, their location on certain fingers or on all nails can make this nail art completely different. Experiment!

Bright neon striped design
Manicure with stripes according to this scheme is suitable for everyday wear, it will perfectly fit into a juicy summer look. Make longitudinal stripes on the nails with bright lacquers of neon colors with your own hands and you will be irresistible this summer. In the design, you can use only 2 bright coatings, and you can create a striped pattern on each leg with different shades of the same color, resulting in a real neon explosion.
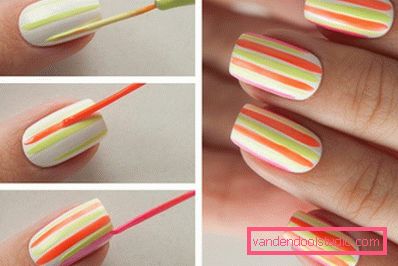
We offer simple instructions that will help you to make such a striped manicure to yourself. You will need 4 shades of bright varnishes, a wide adhesive tape for a manicure (you can use a regular adhesive tape on a paper basis), a top. Now step by step:
- Apply on the nail plate the first shade of lacquer, for example, glowing yellow. We are waiting for it to dry completely.
- Glue the nail tape so that it covers 2-3 mm of the nail from the line of the cuticle.
- Apply 2 shades of lacquer to the open part of the marigold, for example, neon blue. Immediately remove the tape so that the varnish does not start to dry out. We are waiting for the second layer to dry.
- Repeat step number 2, closing the tape 2-3 mm blue lacquer.
- Apply the following shade to the open part of the plate, for example, neon pink.
- Exactly the same pattern applied to the tip of the nail the last 4 color, they can be a bright green color.
- The result is covered with a layer of transparent finish.

Striped nail design for bright girls is ready! Experiment with color combinations and your manicure will not go unnoticed.